AED 3.15
Description
LilyPad is a quite a handy and versatile product. It has a large audience of products that can be sewed. You can use it on your dresses, bag or fabric, in short, any fabric that can be sewed by sewing LilyPad.
LilyPad LED which is used in wearable systems contains one white LED on it.
Features:
voltage: 3v-5v
current :40ma
Product Dimensions: 5x11mm
0,8mm tiny PCB
Lilypad LED SMD Module
One of the most commonly asked questions when getting started with e-textiles is "How many LEDs can I put in my project?" In this guide, we will cover the conductive thread's resistance and how that affects powering LEDs, calculations to predict battery and power requirements, and some construction tips.
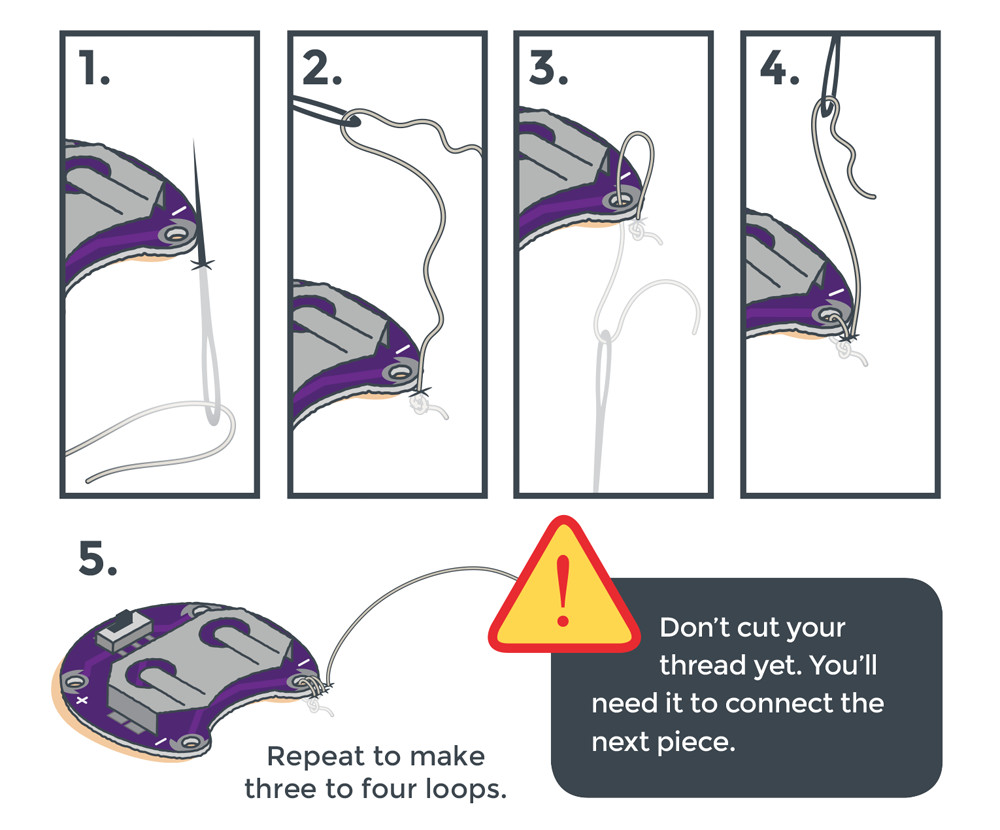
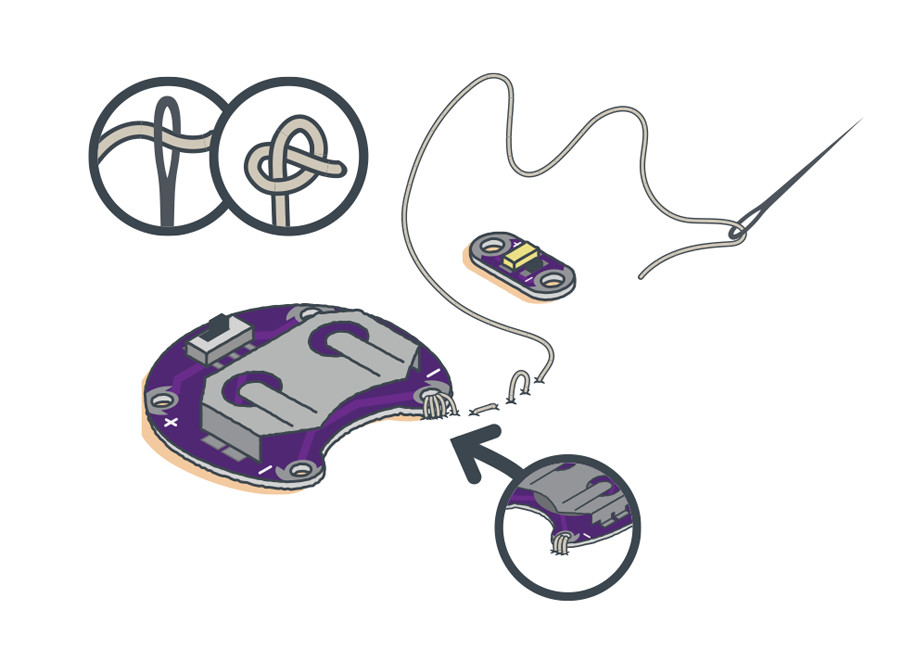
Connecting To LilyPad Sew Tabs |
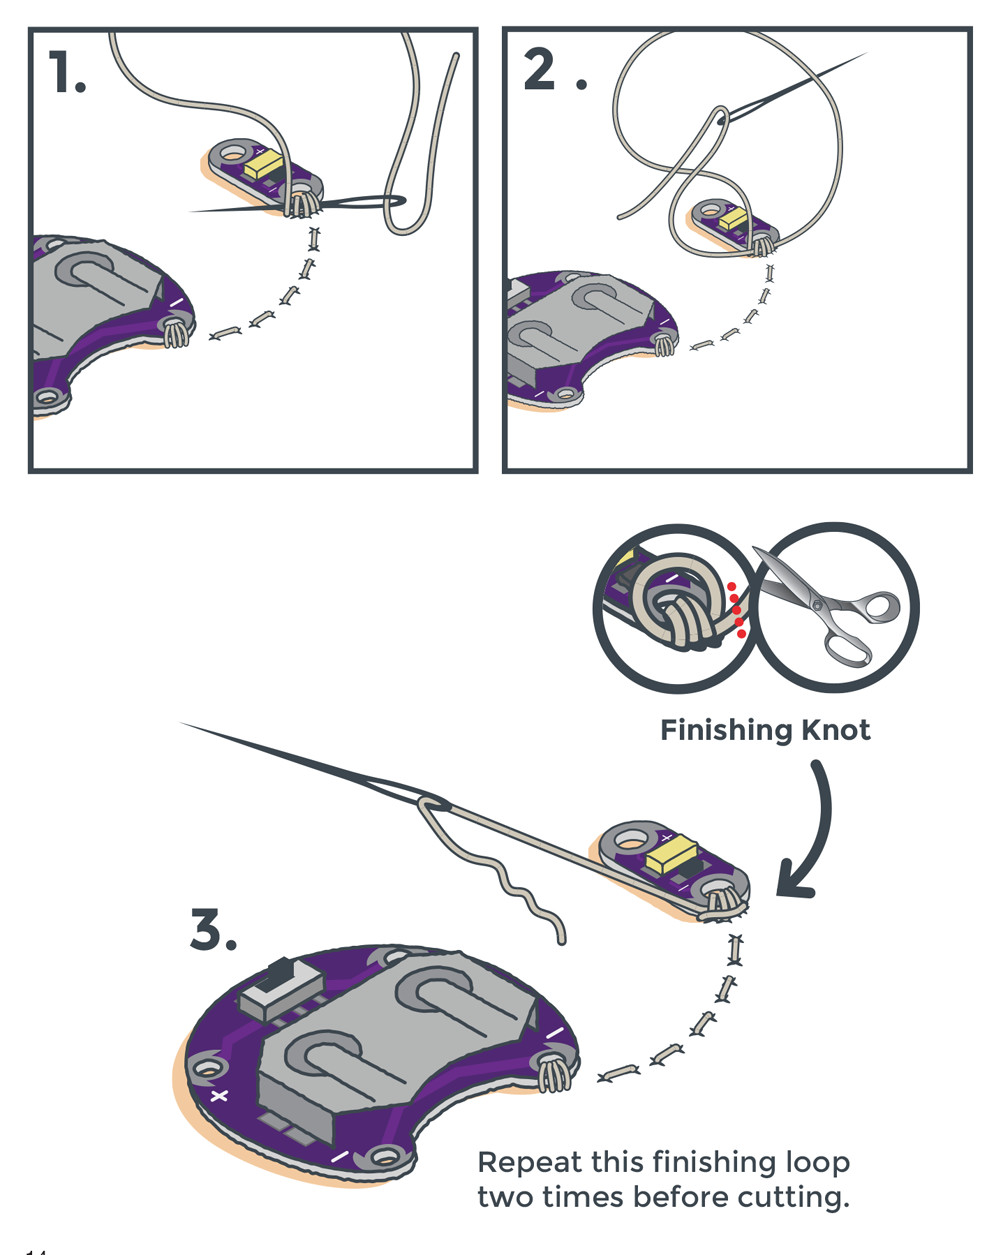
We’ll stitch conductive thread around LilyPad sew tabs in our circuits to connect the pieces together. It’s important that you make three to four loops each time you connect your thread around an empty sew tab and pull the thread snug with each pass. This ensures you have made a strong electrical and physical connection between the thread and the sew tab. Pull loops tight before continuing your stitch.
 | Sewing Basics |
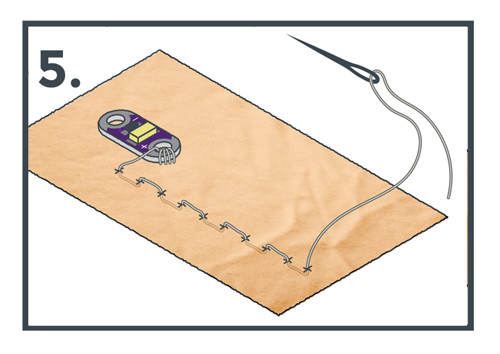
After sewing loops around a sew tab, a running stitch will enable you to connect LilyPad pieces together with a continuous length of conductive thread. Follow these steps:
Push the needle through the fabric about 1/4" in the direction of your stitch path.
Pull the slack of the thread through so it sits flush with the fabric.
Push the needle back up through the fabric another 1/4" along the stitch path.
Pull the slack of the thread through so it sits flush with the fabric.
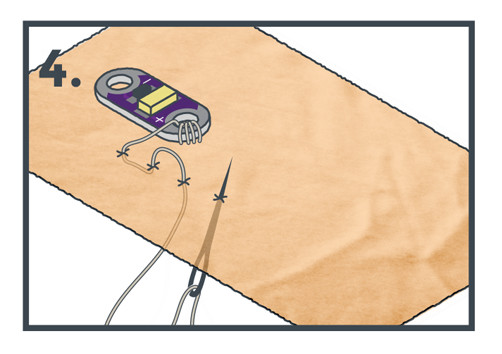
Repeat this process to travel along the path to the next LilyPad piece you want to connect to, keeping stitches evenly spaced.
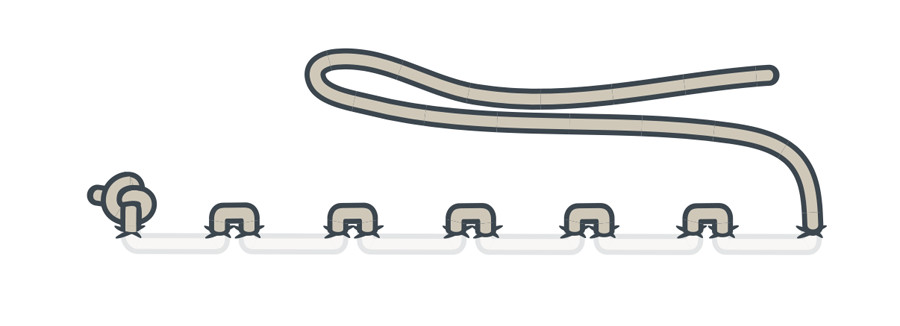
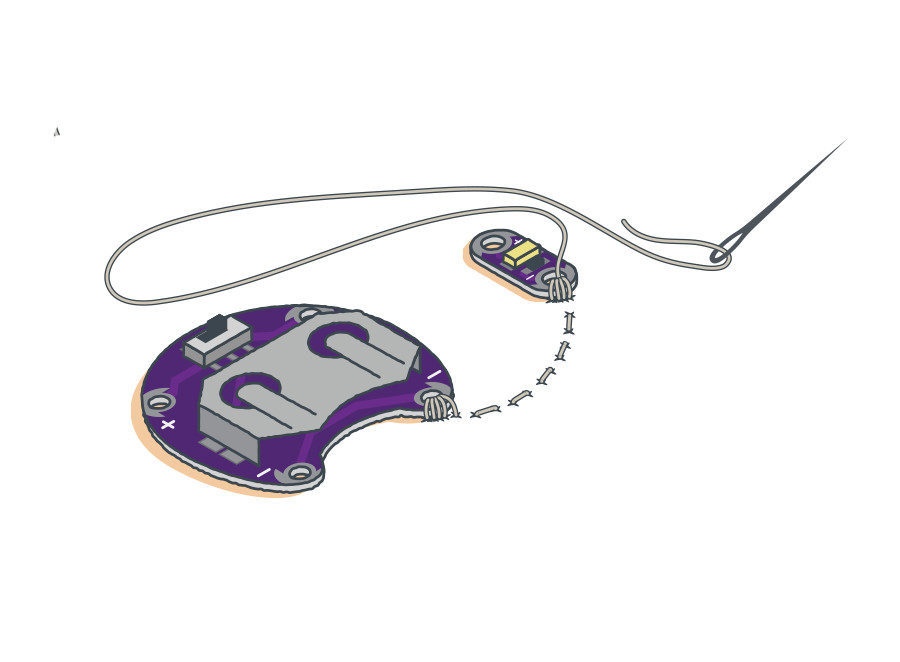
Running vs. Hidden Stitch
In a basic running stitch, the stitching will be even on both sides of the fabric.
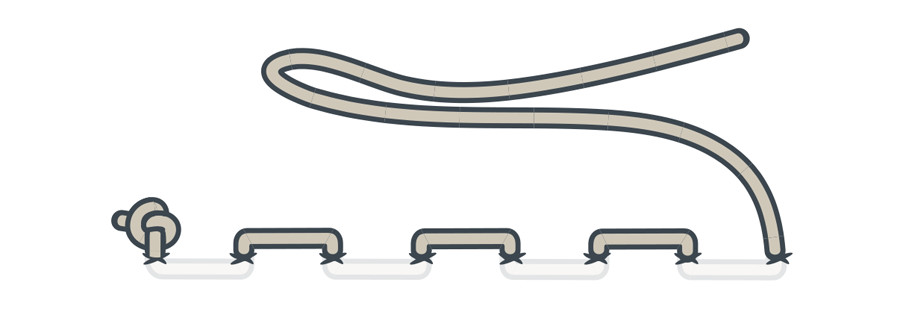
To hide the stitches so that they are not seen on the outside of the project, make a longer stitch on the back of the project and a very small stitch on the front of the project. This method is called a “hidden stitch.”
| Connecting LilyPad Pieces |
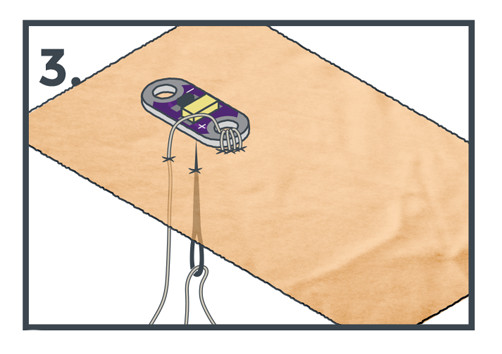
Both running and hidden stitches will enable you to connect LilyPad components together with a single length of conductive thread. To connect two LilyPad pieces, continue stitching after completing three to four loops around the sew tab.
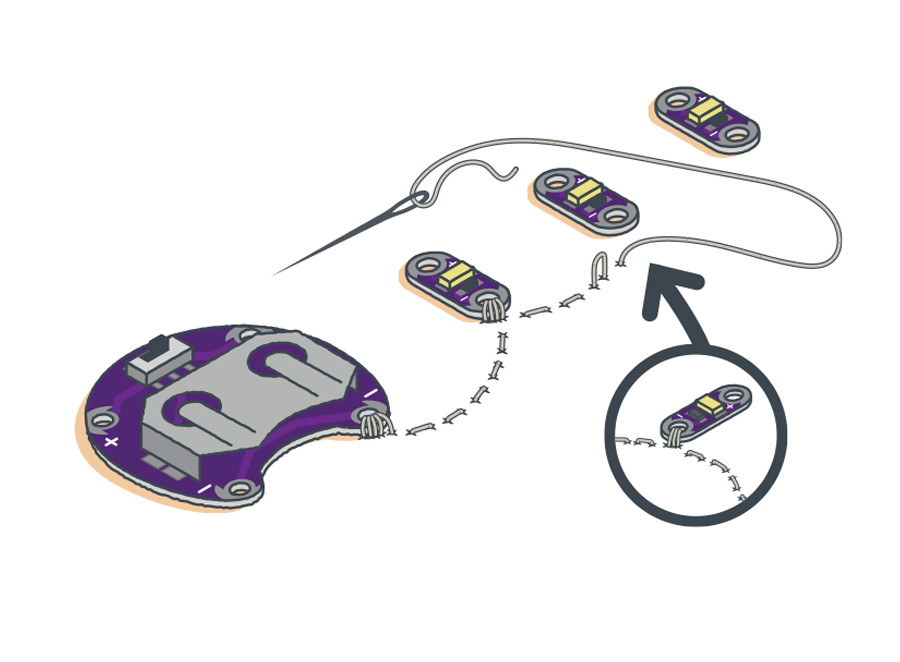
Connecting Multiple LilyPad Pieces
To connect more than two LilyPad pieces, instead of trimming your thread and starting over, continue stitching to the next piece, make three to four loops, and repeat as necessary. There is no need to use a new length of thread if the pieces will share a connection.
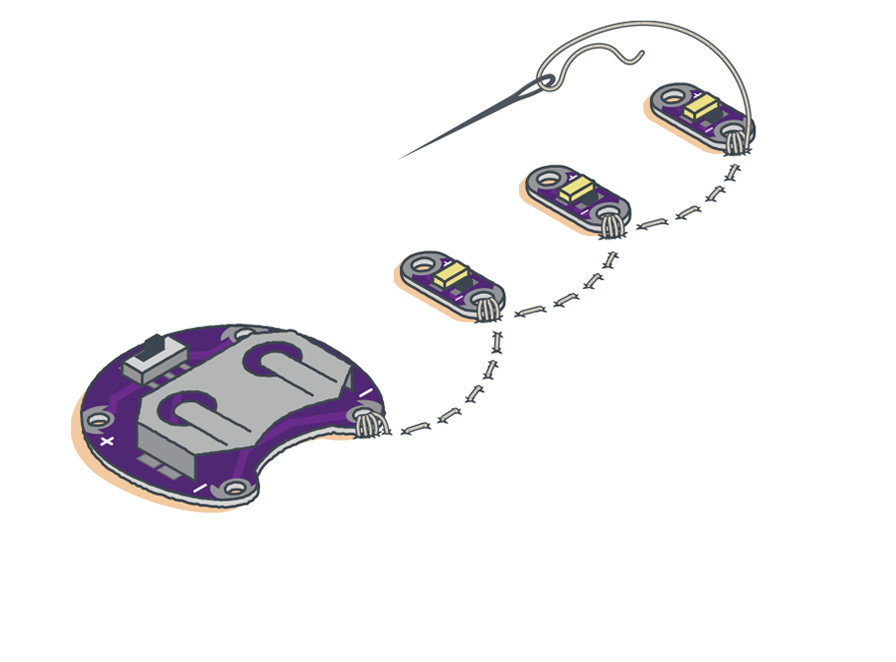
 | Finishing Your Connection |
When you have completed connecting components, use a finishing knot. Thread tails can cause electrical shorts, so be sure to trim your thread afterward.
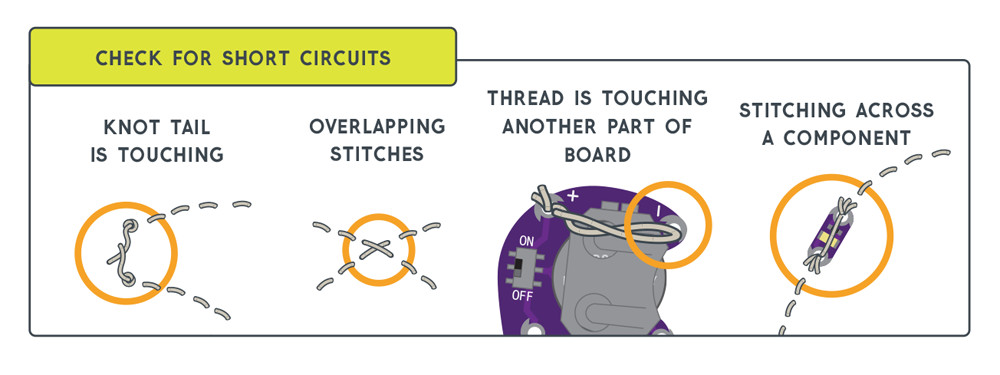
Checking for Conductive Thread Short Circuits
Watch out for any loose threads or knot tails in your project. If any piece of the conductive thread from the positive (+) side of your circuit accidentally touches the negative (–) side, it can cause a Short C. A short circuit connects the battery to itself and bypasses the rest of your project causing an unwanted amount of current draw from the battery. Stitching directly over stitches in another part of the circuit can also cause a short.
It’s important that your stitches do not cross over each other or touch other parts of the circuit. The batteries used in these projects shouldn’t burn or shock you if they short circuit (although they may heat up), but higher voltage projects or power sources could be dangerous.
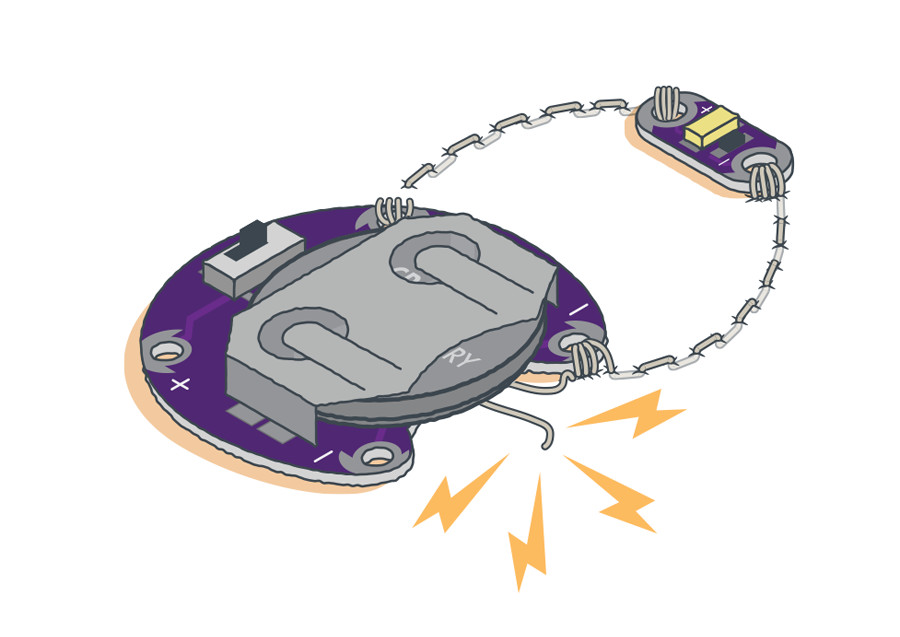
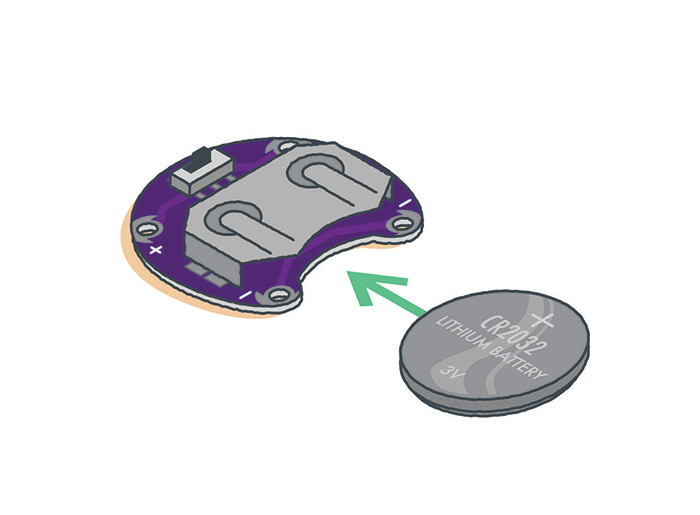
Installing Your Battery and Testing Your Finished Circuit
Once all your pieces are connected with conductive thread, your finished circuit needs a power source. Install your coin cell battery, positive (+) side up, into the battery holder. The image below shows how to place a battery in a LilyPad Coin Cell Battery Holder.
Always remove your battery if you need to continue working on your project to avoid damaging your components.
Light up the LilyPad Sewable Electronics Kit to build your own circuit.
Troubleshooting
As you work on e-sewing projects, you may encounter problems such as loose connections that keep LEDs from lighting or cause your circuit to malfunction. Most LilyPad tutorials have a troubleshooting section to help you identify and solve problems with your circuit.
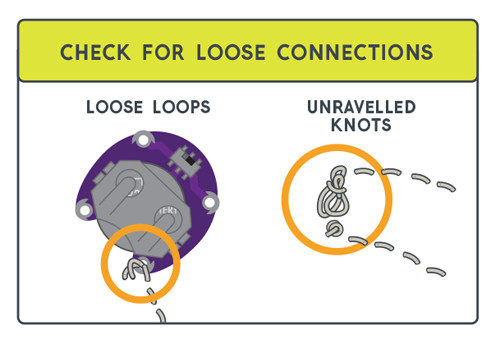
Is circuit only working sometimes? Check for loose connections.
If the conductive thread is not making a tight connection to the LilyPad piece's sew tabs, current will not be able to flow through consistently. If the project moves, the conductive thread may pull away from the sew tab and disconnect the circuit. To fix, pull stitching tight with tweezers or a needle if possible. You may also sew over the top of the existing thread to create more tension and hold the thread securely to a sew tab.
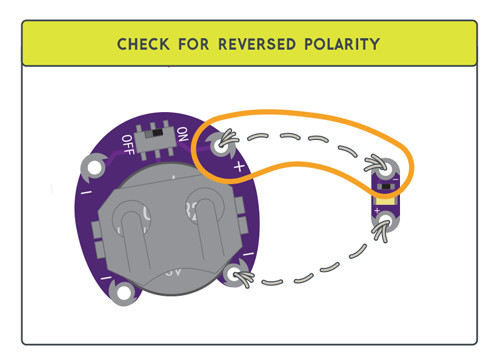
Circuit not working? Double check your polarity.
Some LilyPad components are polarized, meaning electric current can only flow through them in one direction. If sewn into the circuit incorrectly, they will not function. Double check the labeled sew tabs before you stitch to make sure they are oriented correctly.
Other issues to check for:
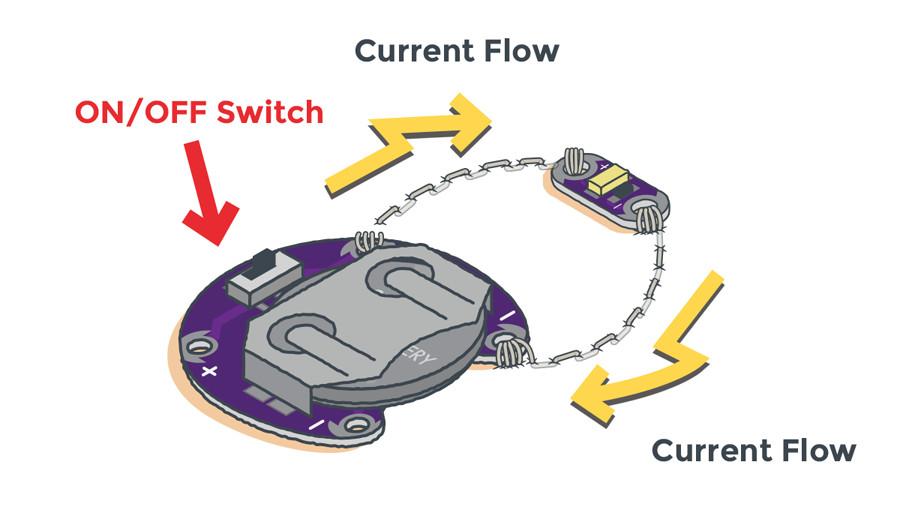
- Make sure the switch on your battery holder is in the ON position.
- Check to see if your battery is dead. You can do so with a Multimeter. Try installing a spare battery.
- If following a project template, double-check that the components are connected together in the right configuration
If you are still having trouble, you can use a multimeter to check for continuity or issues with your circuit.
Caring For Your Project
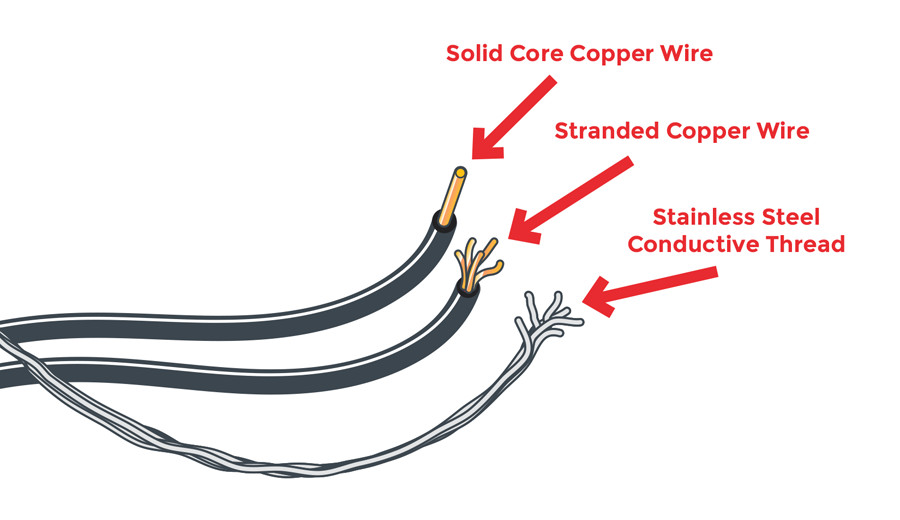
Unlike copper wire, which has a coating, the conductive thread is uninsulated. This means the thread behaves like bare wire and can accidentally short circuit if stray strands come in contact with each other.
To avoid any accidental short circuits after the project is stitched and tested, we recommend covering the thread with a thin layer of fabric glue, fabric paint, or an additional layer of fabric. This is especially important for projects that are wearable or three-dimensional. Never work on a metal surface when using conductive thread.