This model comes in a smaller size than the Raspberry Pi 3 B Plus The 1.4GHz clock speed, 5GHz wireless networking, and improved thermals of the Raspberry Pi 3B+.This network module includes a dual-band WiFi module (802.11b/g/n/ac) as well as a Bluetooth 4.2 module
AED 380.00
Description
This Pi is equivalent to the Raspberry Pi 3 B Plus, but it lacks a few extra features. It has the same processing power as before, in a much smaller package. The 3 A+ is 20 mm smaller than its big brother, the 3B+, after the removal of several parts and the reduction of RAM. The 1.4GHz clock speed, 5GHz wireless networking, and improved thermals of the Raspberry Pi 3B+.This network module includes a dual-band WiFi module (802.11b/g/n/ac) as well as a Bluetooth 4.2 module.
The addition of a far faster processor is one of the major improvements that came with the Pi 3 A Plus. This improvement replaced the first generation's old outdated single-core ARM processor with an improved quad-core ARM Cortex-A53 processor clocked at 1.4 GHz. One advantage of the more advanced CPU is that the Raspberry Pi 3 Model A+ could indeed operate most ARM-based operating systems. This improved support is largely due to the CPU's support for the ARMv8 instruction set.
Specifications:
CPU: 1.4 GHz quad-core ARM Cortex-A53 CPU
GPU: 250MHz Broadcom VideoCore IV
RAM: 512MB (Shared with GPU)
Storage: Micro SD
USB 2.0 Ports: 1
USB 3.0 Ports: 0
Networking: 802.11b/g/n/ac dual-band 2.4/5 GHz wireless, Bluetooth 4.2 LS BLE
Video-Input: 15-pin MIPI camera interface (CSI) connector
Video Outputs: HDMI 1.3, MIPI display interface, DSI
Audio Inputs: Audio over I2S
Audio Outputs: 3.5mm phone jack, Digital Audio via HDMI
Low-Level peripherals: 17 x GPIO, +3.3v, +5v, ground, Plus the following that can be used as GPIO: UART, I2C Bus, SPI bus with two chip select, I2S audio
Power Source: 5v via MicroUSB or GPIO header
Size: 65.00mm x 56.50mm x 17mm
Weight: 23 g (0.81 oz)

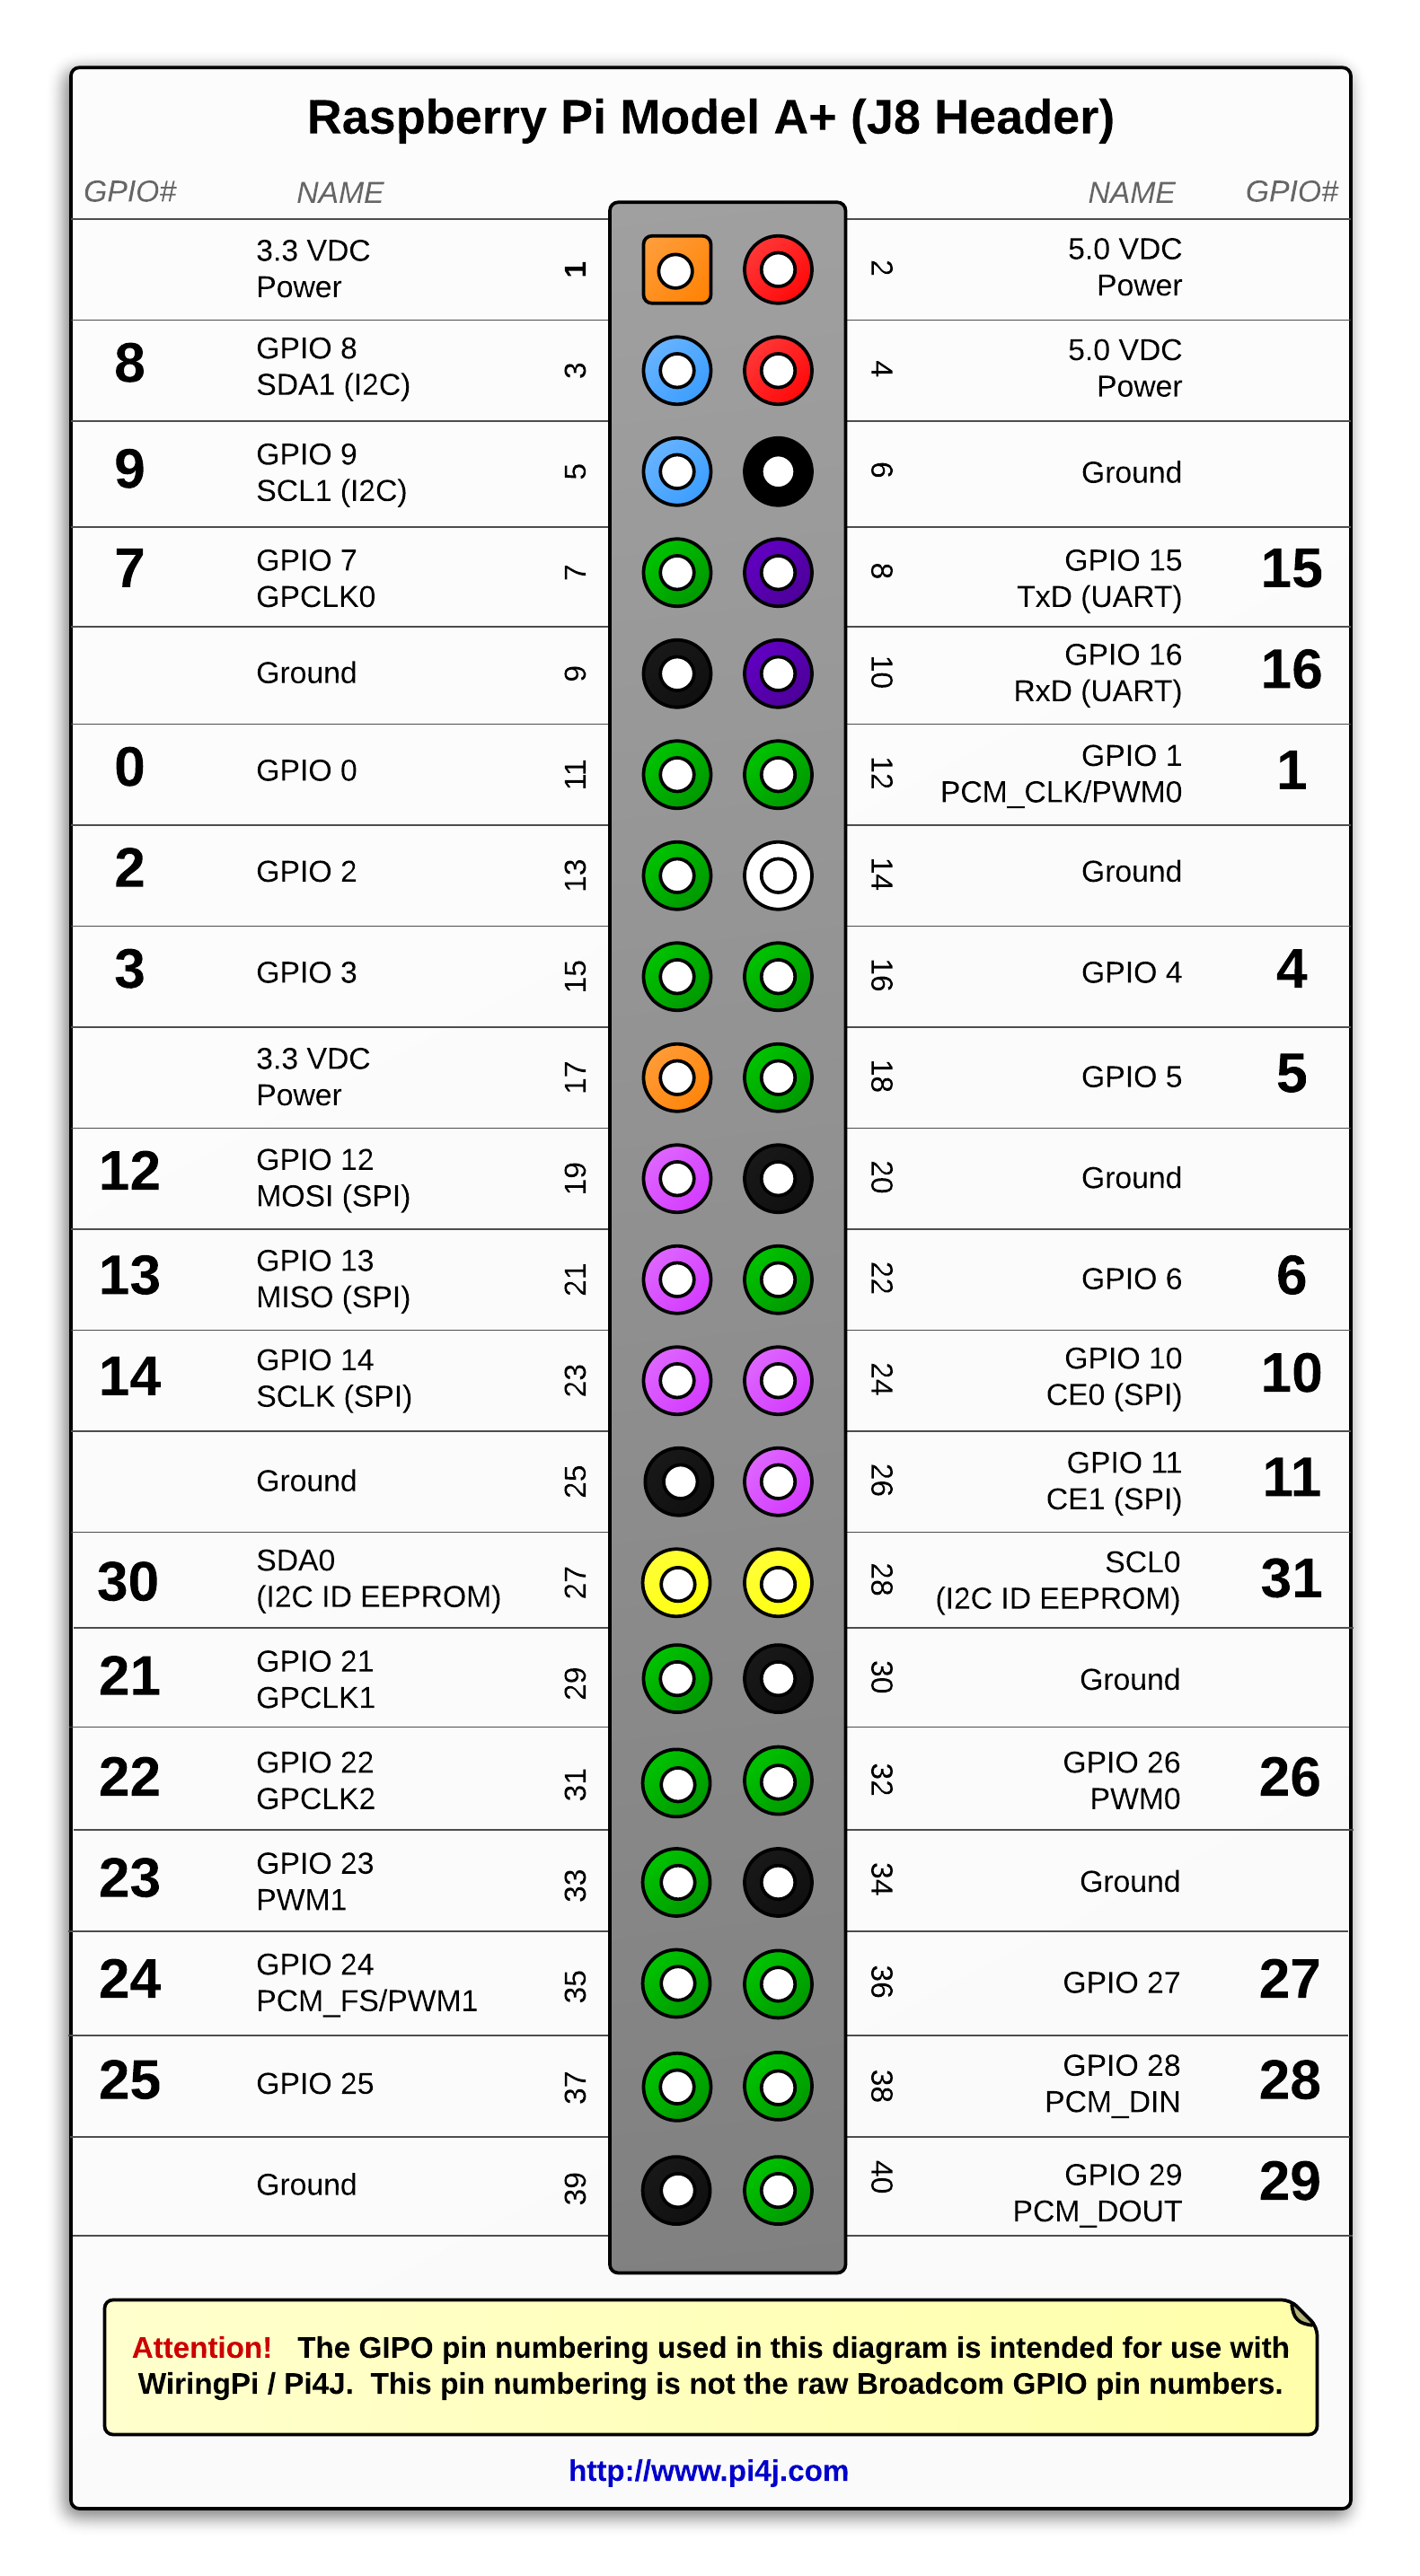
Pinout of the RPi 3 A+ :
Getting Started:
We need a few things before we can start testing the raspberry. We'll need a power supply with a 5V 2500mA rating. The SD card with the installed operating system will be required next. We must prepare the other PC accessories, such as the PC and other computer accessories because this module cannot be connected via a terminal.
The OS that most people use is Raspbian. For formatting the sd card you can use SD Formatter. And to flash the Raspbian OS to the sd card using Etcher. Both of these are free so please feel free to use them. Once the sd card is ready, put it in the sd card slot and power it up.
Resources
General Tutorial Series
- Raspberry Pi Tutorial Series
- Raspberry Pi Tutorial Series: Access your Pi
- Raspberry Pi Tutorial Series: Getting Started with lighting up an LED
- Raspberry Pi Tutorial Series: External Button
- Raspberry Pi Tutorial Series: I2C
- Raspberry Pi Tutorial Series: I2C Programming
- Raspberry Pi Tutorial Series: 1-Wire DS18B20 Sensor
- Raspberry Pi Tutorial Series: Infrared Remote Control
- Raspberry Pi Tutorial Series: RTC
- Raspberry Pi Tutorial Series: PCF8591 AD/DA
- Raspberry Pi Tutorial Series: SPI